Dactyl Manuform: Handwired Ergonomic Split Keyboard
Building a Dactyl Manuform ergonomic split keyboard from scratch — manual wiring, QMK firmware, and flashing it yourself.
Hardware project: rebuilding a Dactyl Manuform keyboard — split, ergonomic, handwired — from the keymap reverse-engineering phase through to flashing QMK firmware. The repository is tracked as a setup because it’s part of an ergonomic workstation, not a product meant to be published.
Why the Dactyl Manuform
The Dactyl Manuform is a curved variant of the original Dactyl: a 3D-printed case with key contours that follow finger length, plus a thumb cluster angled toward the thumb.
Ergonomic benefits:
- Wrists don’t have to rotate.
- Fingers travel shorter distances.
- The load is absorbed by the large muscles of the hand, not the small tendons in the palm.
The trade-off is clear: no vendor sells this unit pre-made — everything has to be handwired, and the firmware is custom.
Specifications
Hardware & Firmware
| Item | Detail |
|---|---|
| Layout | Dactyl Manuform (ergonomic split) |
| MCU | Pro Micro (ATmega32U4) × 2 |
| Firmware | QMK |
| Split connection | TRRS cable |
| Matrix | 6×6 + thumb cluster per side |
| Diode direction | COL2ROW (not yet confirmed) |
| Master side | Right (MASTER_RIGHT) |
Matrix Capacity

Theoretical maximum key count with this configuration:
In practice it’s fewer — not every matrix point is used, and some are allocated to the thumb cluster, which is mapped to the same rows/columns.
Reconstruction Plan (7 Phases)

The project is organized as a phased rebuild. Each phase produces a verifiable output before moving on to the next:
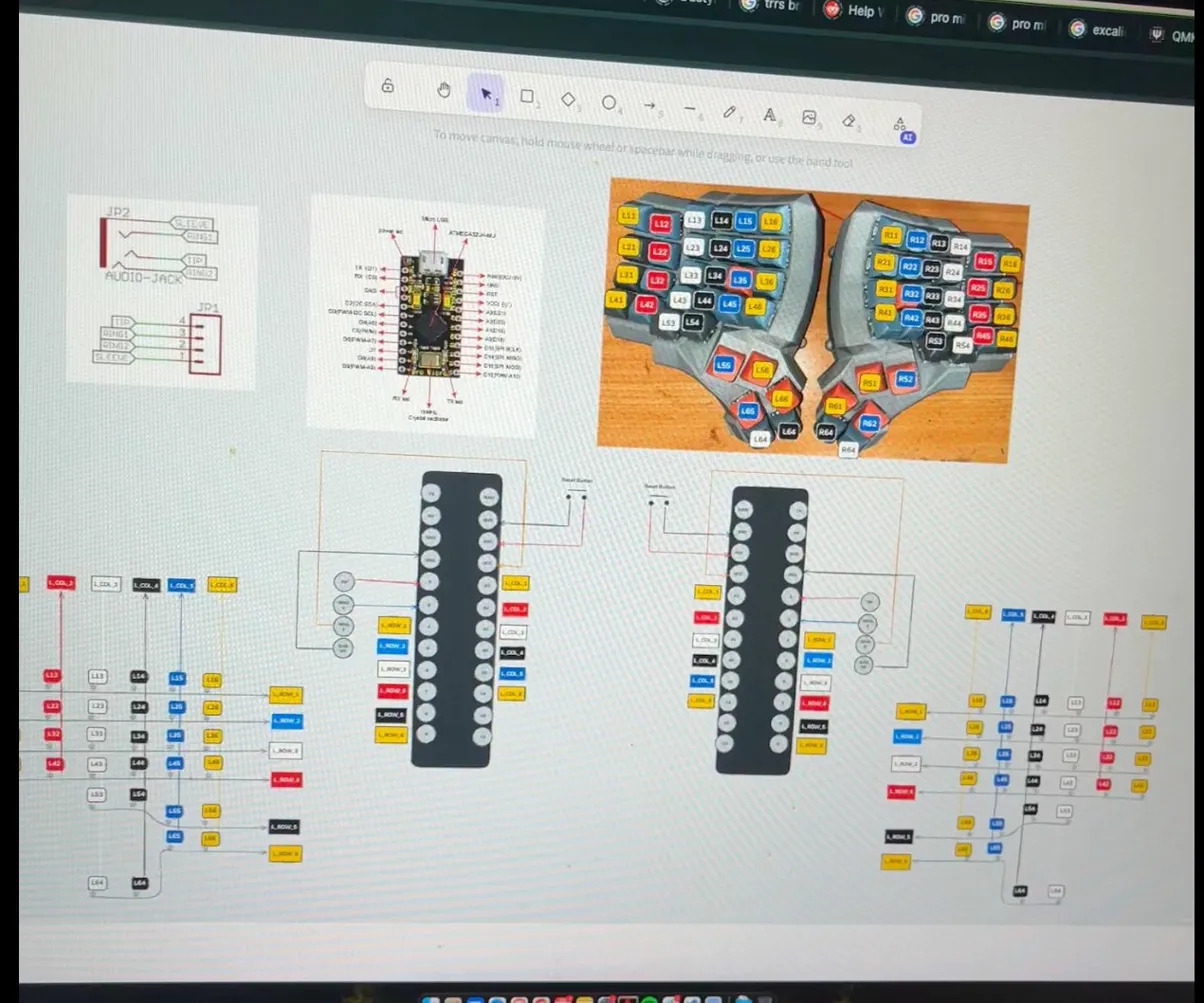
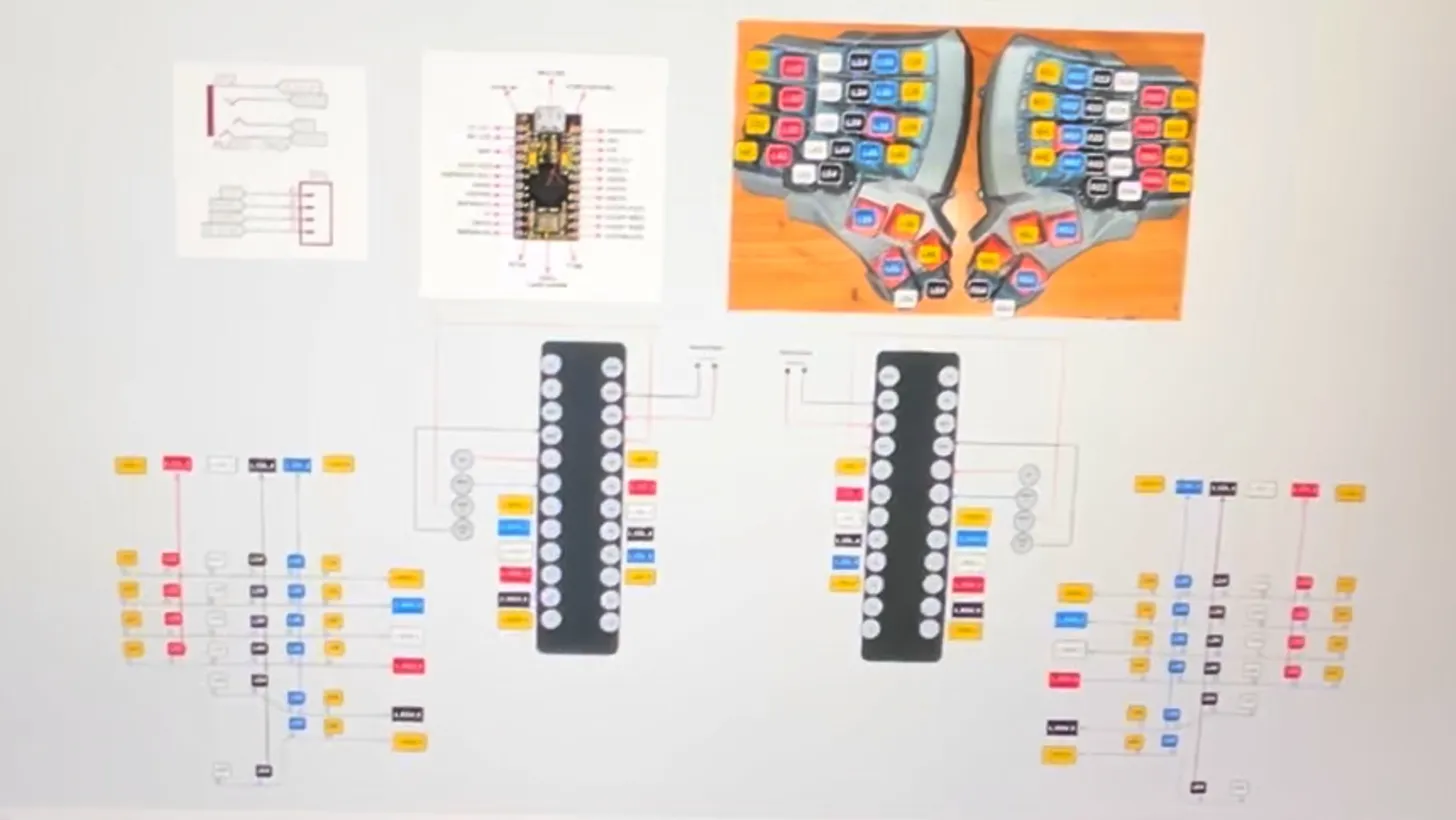
- Phase 1 — Reverse-engineer the keymap from the old firmware (manual key testing)
- Phase 2 — Scaffold the QMK project structure
- Phase 3 — Configuration files (
config.h,info.json) - Phase 4 — Keymap template (
keymap.cwith all layers) - Phase 5 — Confirm the master method (
MASTER_RIGHTvsEE_HANDS) - Phase 6 — Safe flashing (compile → flash → repeat for the other side)
- Phase 7 — Matrix debugging via
qmk console
⚠️ The QMK files are currently placeholders. Pin assignments and matrix size have to be confirmed once Phase 1 is physically complete — get it wrong and key events won’t register at all, or will register at the wrong position.
Repository Structure
.
├── docs/
│   ├── reconstruction_plan.md   # Rencana rekonstruksi firmware
│   ├── build_log.md             # Catatan progress
│   └── images/
├── firmware/
│   └── qmk/
│       └── dactyl_manuform_custom/
│           ├── config.h                    # ⚠️ pin placeholder
│           ├── info.json
│           ├── rules.mk
│           ├── dactyl_manuform_custom.h    # macro LAYOUT
│           ├── dactyl_manuform_custom.c
│           └── keymaps/
│               └── default/
│                   ├── keymap.c            # 4 layer
│                   ├── config.h
│                   └── rules.mk
├── LICENSE
└── README.md
Build & Flash
QMK Setup
One-time install of QMK via pip:
pip install qmk
qmk setup
Compile & Flash
Copy the keyboard folder into the QMK firmware directory, then compile and flash:
cp -r firmware/qmk/dactyl_manuform_custom \
      ~/qmk_firmware/keyboards/handwired/

qmk compile -kb handwired/dactyl_manuform_custom -km default
qmk flash   -kb handwired/dactyl_manuform_custom -km default
Flashing is done per side: plug in the side you want to flash, press the reset button when prompted, then repeat for the other side.
Tools
| Tool | Purpose |
|---|---|
| Neovim | Primary editor |
| tmux | Terminal multiplexer |
| QMK CLI | Build & flash firmware |
| Pro Micro (ATmega32U4) × 2 | Microcontroller per side |
References
| Resource | Link |
|---|---|
| QMK Documentation | https://docs.qmk.fm |
| QMK Split Keyboard | https://docs.qmk.fm/#/feature_split_keyboard |
| Pro Micro Pinout | https://learn.sparkfun.com/tutorials/pro-micro—fio-v3-hookup-guide |
| Dactyl Manuform QMK | https://github.com/qmk/qmk_firmware/tree/master/keyboards/handwired/dactyl_manuform |
| Keyboard Tester | https://www.keyboardtester.com |
Status
This project is in-progress. Progress updates are tracked in docs/build_log.md in the repo. Once Phase 1 is finished and the matrix pins are confirmed, this post will be updated with the final keymap and the custom layers used day-to-day.